Updated 18 March 2019
Developed by: Daniel Connell
English Tutorial Text: Daniel Connell
Contents of this tutorial:
Description
Tools
Materials
Resources
Step By Step Instructions
Configurations and Applications
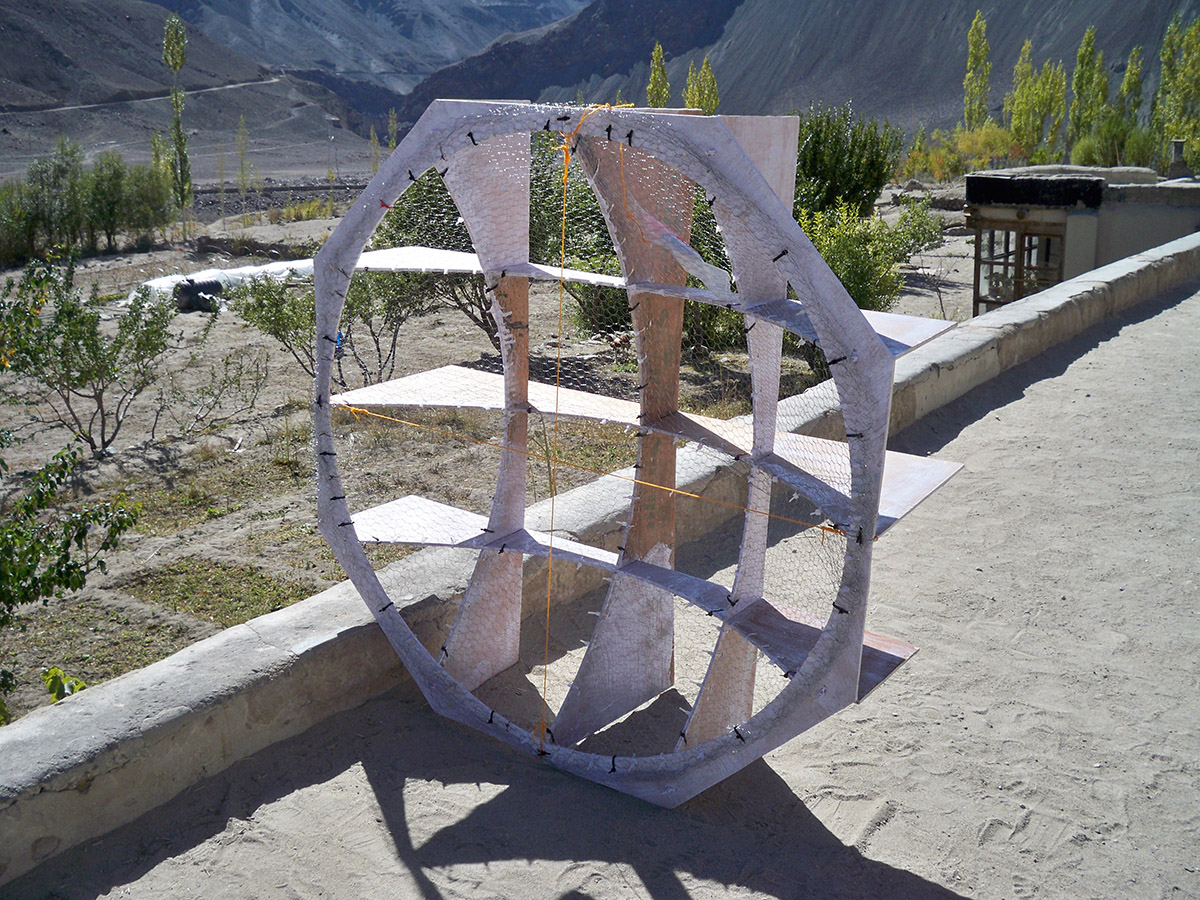
This is a paraboloidal reflector dish, more or less a sattelite dish, that can easily be made from one sheet of plywood or other board, chicken wire or other mesh, and cable/zip ties.
It works by reflecting wifi or mobile signal and focusing them onto a receiver such as your phone, USB wifi adaptor, hotspotN, etc.
As long as the gaps in the metal wire mesh are smaller than about 12mm across they should reflect the signal as if they were a solid surface, except much lighter, cheaper, and easier to work into a smooth curve.
|
Jigsaw |
|
| Power drill | |
|
Drill Bit |
|
| Tape Measure | |
Marker Pen |
| 1 Sheet of Plywood / OSB / Other Board Standard size; 1200x2400 / 1220x2440 / 8' x 4' 12 or 6mm thick gives a nice solid result, but 3mm also works, is cheaper, lighter, and quicker to cut. |
|
|
|
|
200 Cable Ties / Zip Ties | |
2 Meters Fine Chain | |
Spray Paint | |
String / Twine |
Resources:
| Print Templates: | 3D Model (zipped) |
Rhino .3DM (1.09 MB) |
Step by step build instructions:
This tutorial is up to date, but isn't yet fully detailed. It does contain all the information you need to make the dish, but I will be writing something more complete and easier to follow soon. However it is a very easy build process and you should be able to make it from what's here. Email me if you have any questions.
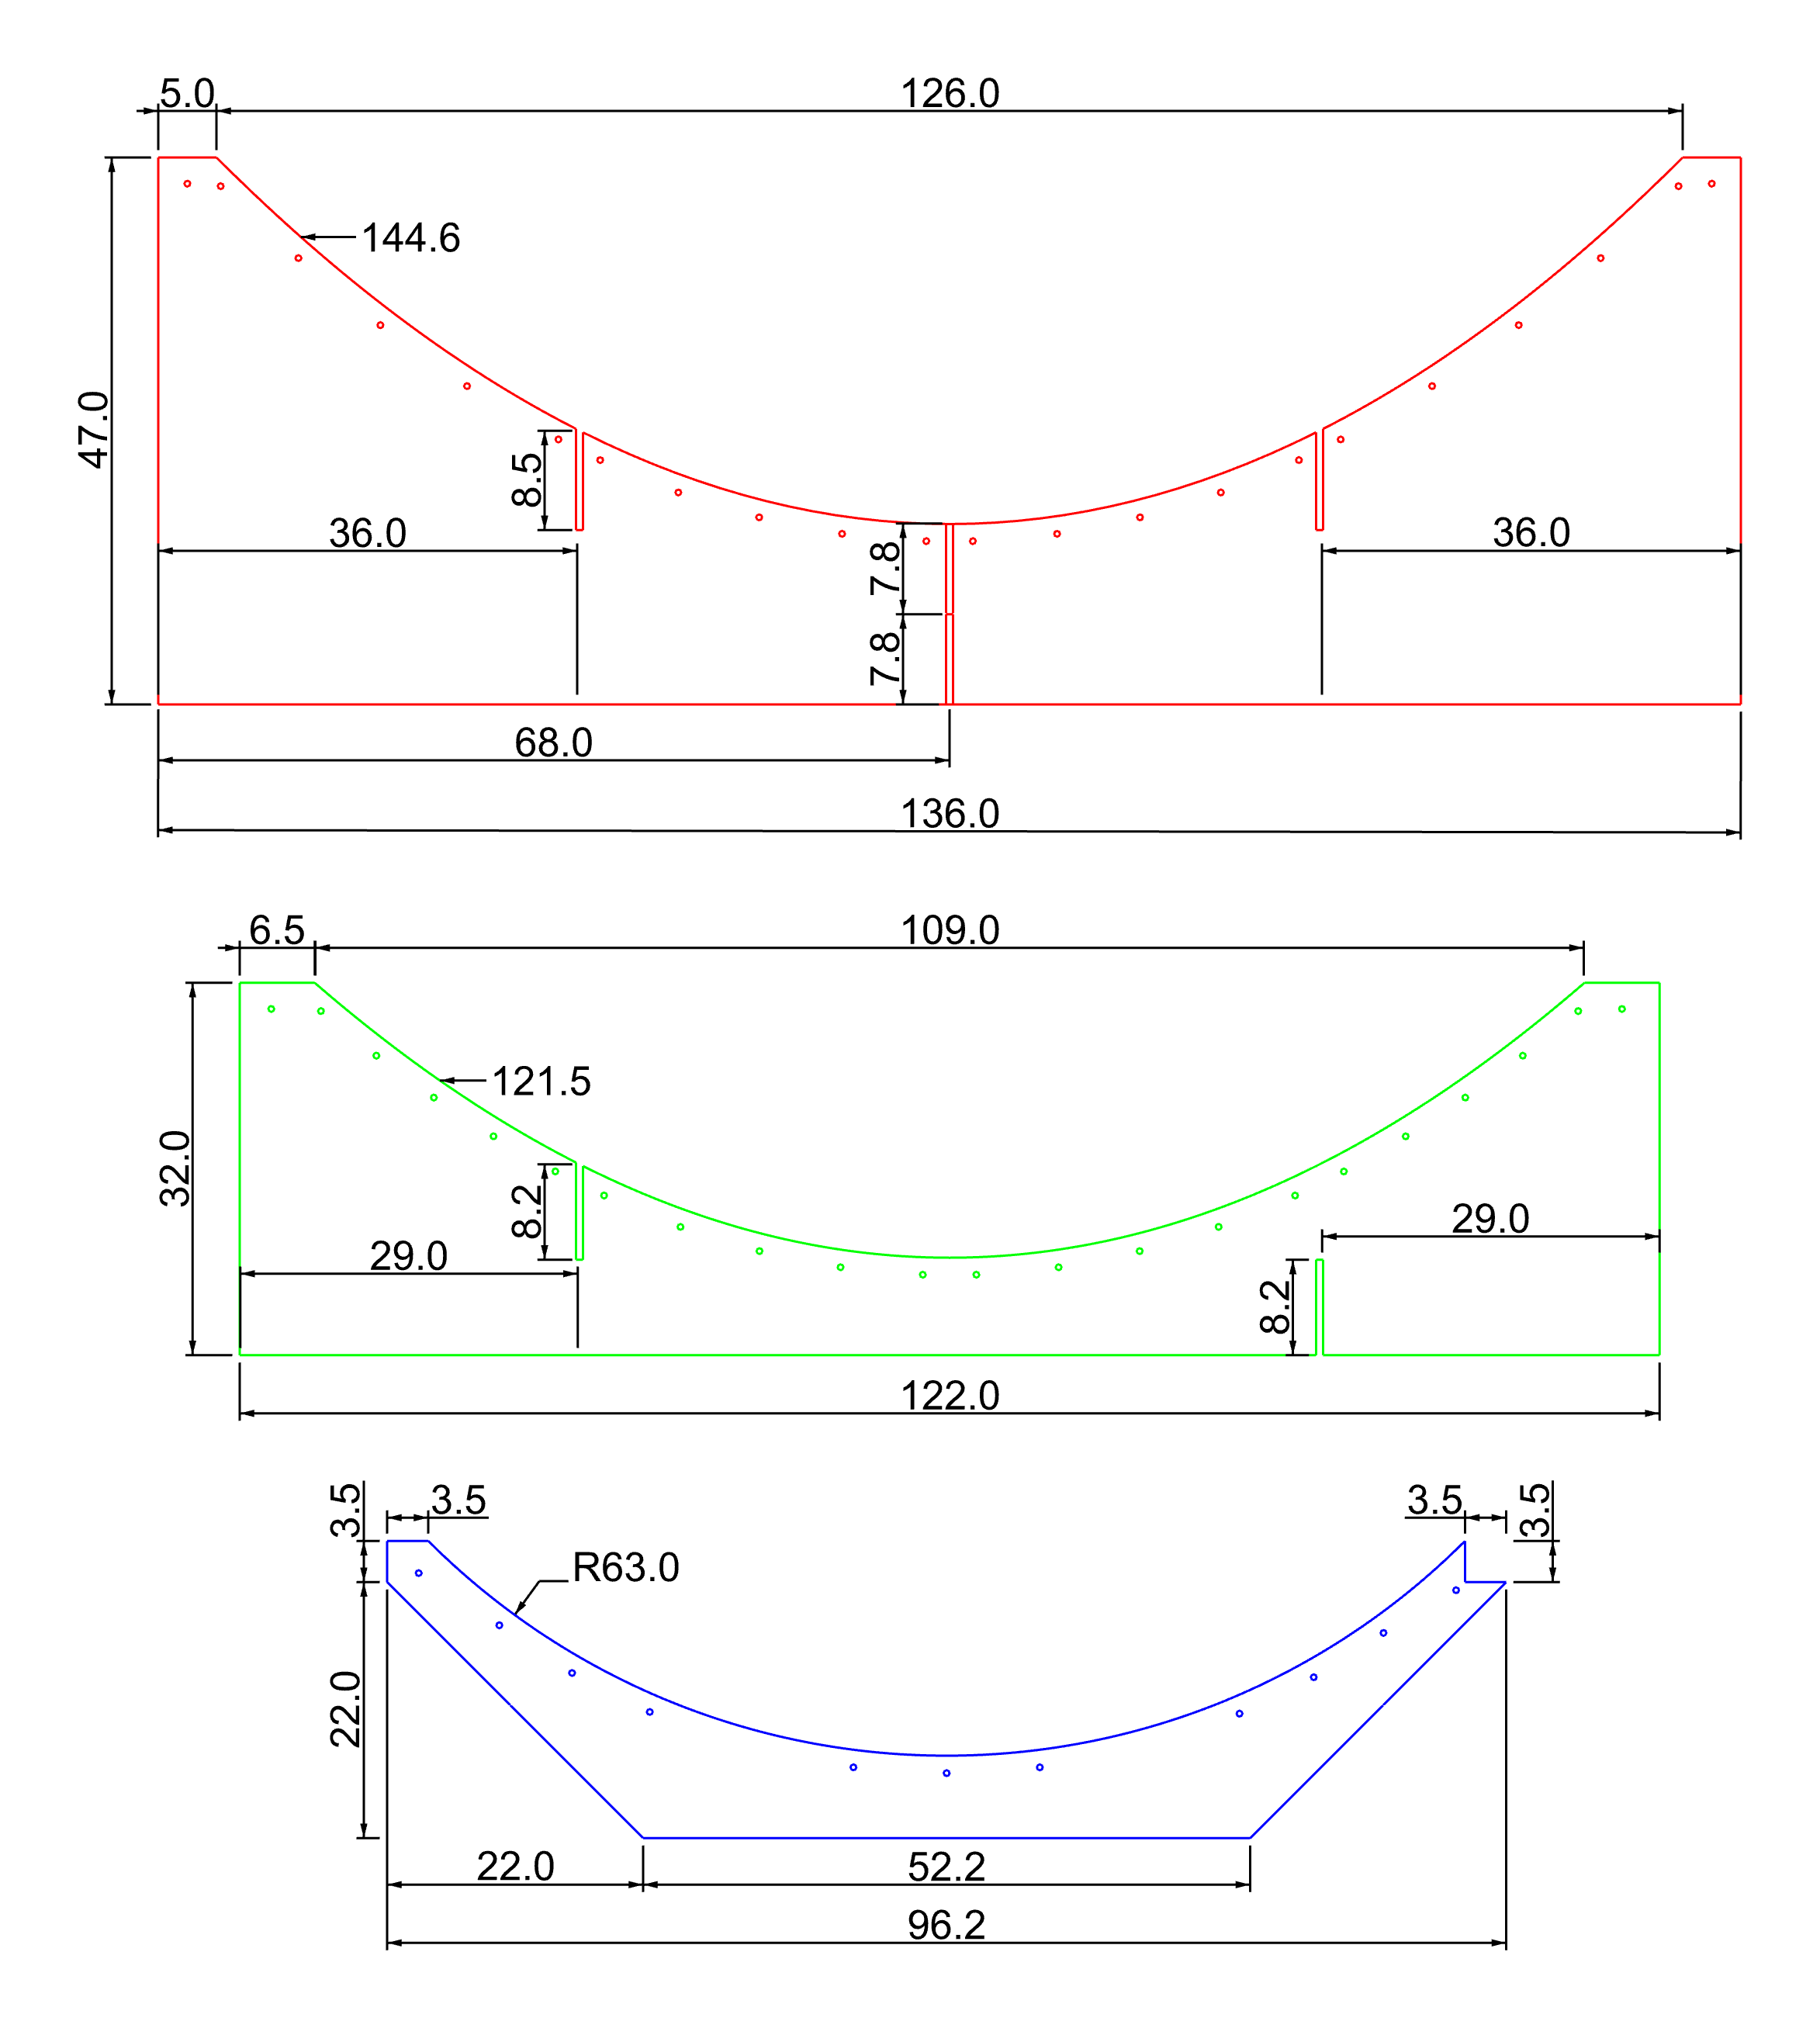
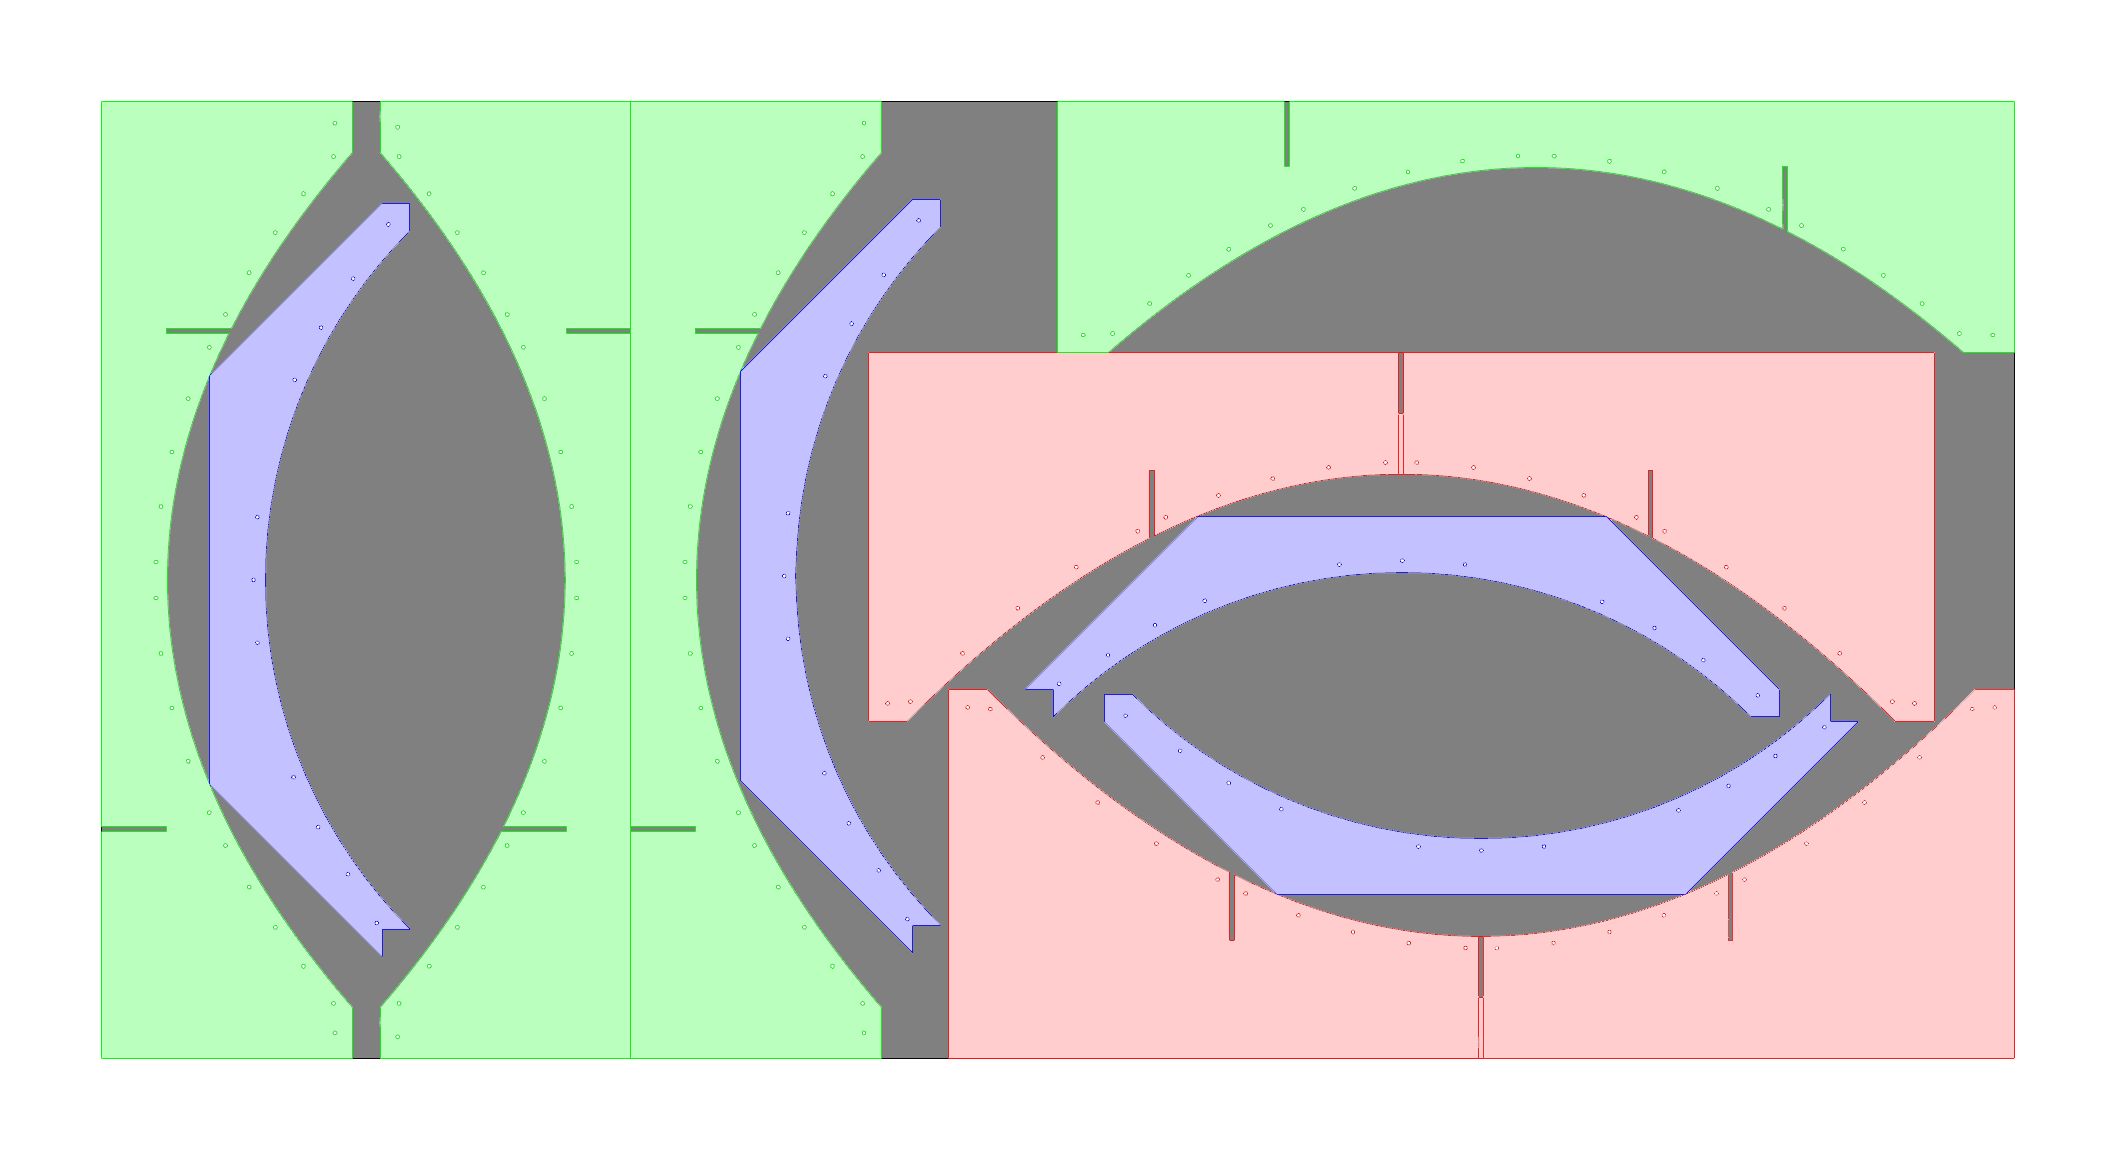
First, mark out the templates on plywood. You'll need 2 of the red one, 4 of the green one, and 4 of the blue. You should be able to get everything on one standard size sheet of board if you lay them out like this:

To draw the parabolas the easiest way is to get yourself some light chain. When a chain hangs it makes a catenery curve, which is reasonably close to a parabola.
Mark off a length of chain as described on the template (144.6cm for the red, 121.5cm for green).
Attach that length to the ply at the points marked with tape, nails, pins, or whatever's easiest, making sure they are the right distance apart.
Spraypaint over the chain to mark its curve. It's a bit easier to cut out if you re-mark the curve in pen, making sure everythings is as smooth and accurate as possible.
The 63cm radius circular curve on the blue piece is easiest done by attaching your pen to a 63cm length of string to draw the radius.
Cut out the templates with a jigsaw or similar. Once you've measured and cut one of each type of piece (blue, green, red) you can use them as templates to draw the others.
Drill five holes close to the edge of each section of curve for putting cable ties through when you're attaching the mesh.
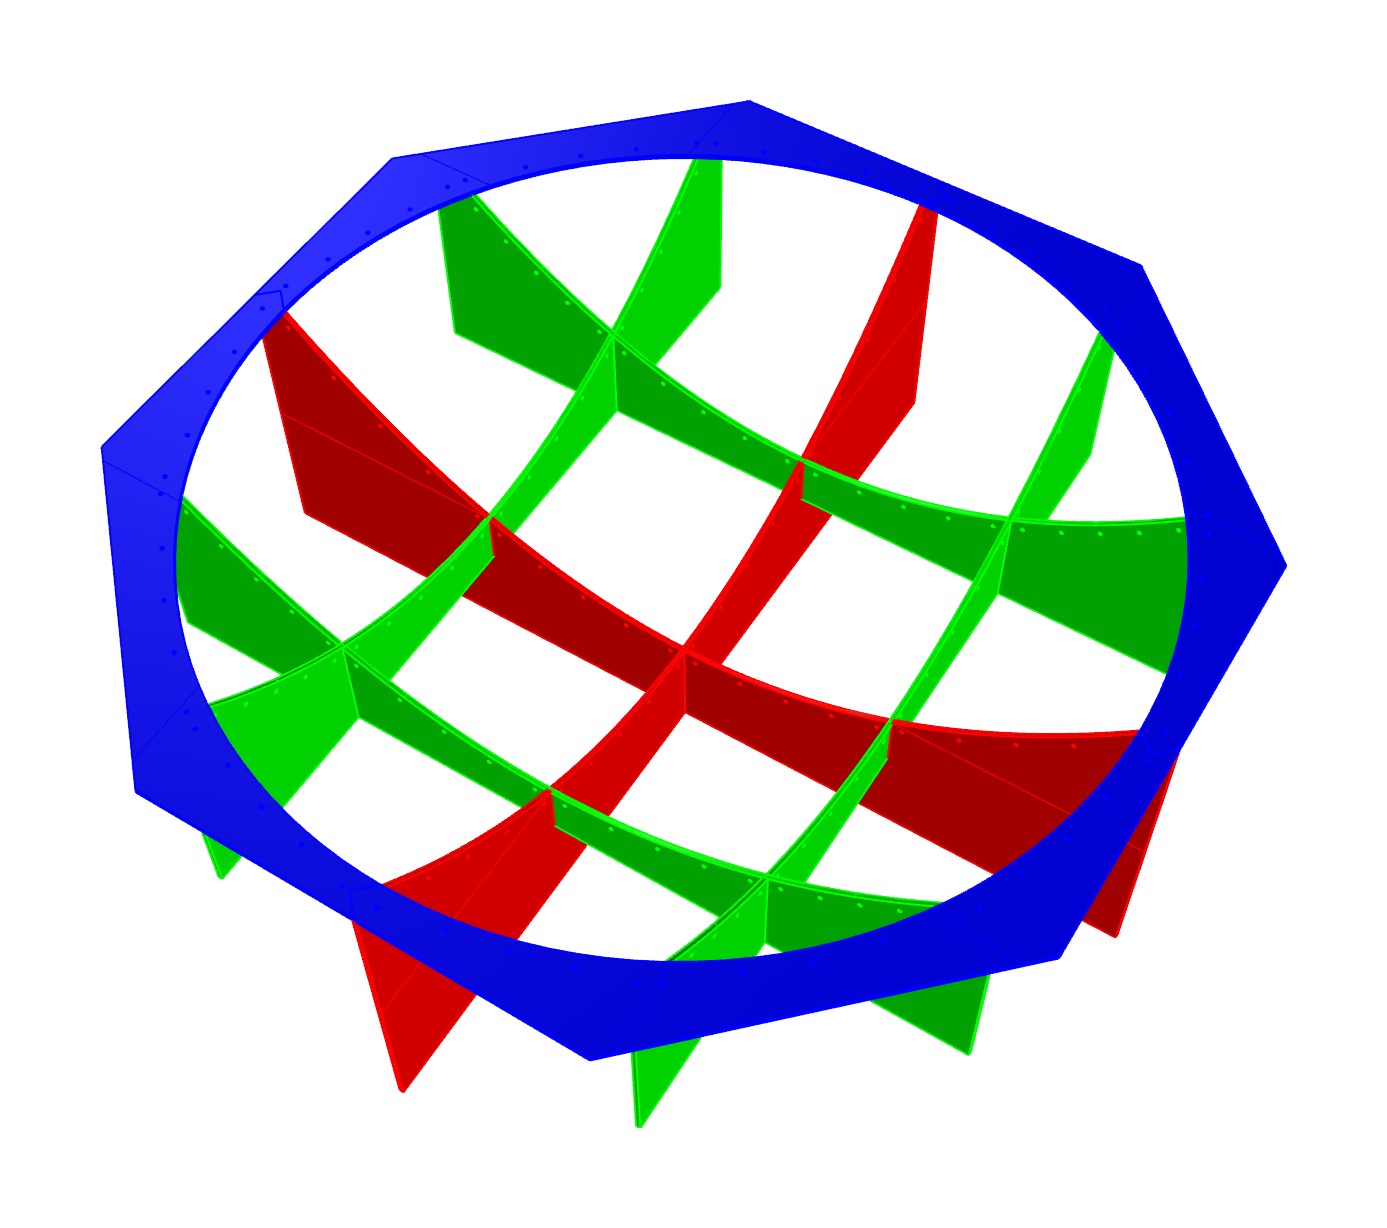
Slot them all together, like so:

Tie two lengths of string across the dish so they meet at the centre of the front opening. Get this as tight as possible. This is the focus of the dish and where you want to attach your wifi or mobile reciever device.
The dish is now finished, attach your device(s) to where the strings meet, and aim the dish wherever you get the best signal. A more complete tutorial is in the works, if you have any questions in the meantime feel free to email me.
